Pimp Your Terminal (macOS)

Welcome to my blog 👋🏽
I'm a Front-End Developer with a passion for learning!
I write about Programming 👩🏽💻 and Productivity Tips ✅
I used to watch tutorials and see cool terminal setups and wonder how they were able to configure it to look the way they did. One day I came across Wes Bos's- Command Line Power User Playlist and I had finally found an answer that walked me through the process! In his tutorials, he uses iTerm2 to show you how to customize your terminal.
I will be showing you the steps using Hyper with a few examples showing you how to change settings in the default terminal. However, I have tried to structure the steps so that you can apply it to whatever terminal you decide to use. This article will take a few lessons taught from that series and break it down into a written format so that you can customize your terminal in no time.
Choose Your Terminal 🤔
There are three main options when it comes to terminals:
Option 1 - The default terminal provided on a Mac. If you decide you want to use this option, feel free to move on to the next section.
Option 2 - iTerm 2 which is the OG terminal emulator. You can download iTerm2 here.
Option 3 - Hyper which is the newer, Electron-based terminal. This is the option I will be showing a majority of the examples from. You can download Hyper here.
Install the Shell 🐚
To verify if you have zsh pre-installed, run echo $SHELL in your terminal. If the response doesn't come back with /bin/zsh then you need to go through the process to install zsh. I recommend doing so with homebrew via brew install zsh.
Next, you need to download Oh My Zsh which provides a framework for managing zsh configurations.
What is the shell?
- A shell provides a way to interact with the computer via commands and scripts. A shell is simply a command-line interface (CLI) that allows users to interact with the computer’s operating system. Bash used to be the default shell but with the Catalina operating system, the default will now be zsh.
- Most people prefer zsh because bash is a relatively basic shell and zsh makes it easier to customize and provides more advanced features like better autocompletion handling and spelling correction.
What is Oh My Zsh?
- Oh My Zsh is a framework built on top of zsh to make developers' lives easier.
- As an example, you can think of zsh as JavaScript and Oh My Zsh like the jQuery library. The Oh My Zsh framework is built to work with the main language.
Customize Themes and Fonts 🎨
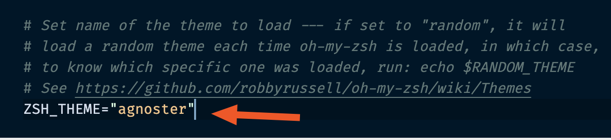
- All settings for zsh lives in your
.zshrcdotfiles which is in your home directory. - To change the theme run
open ~/.zshrcto view the.zshrcfile and set it to an Oh My Zsh theme of your choice. Open up a new tab and you should see the new theme applied. - In addition to the Oh My Zsh theme, you can add a Hyper theme.
After installing the theme your terminal may look a little wonky like this:

To get the special icon indicators you need to install Powerline Fonts. This contains a large list of fonts that you may use and they have been patched to include the special characters for these fonts used throughout the themes.
- I used Inconsolata so to download that particular font you would go to 📁 fonts/Inconsolata/Inconsolata for Powerline.otf and click "view raw" which will download the font and prompt you to install it.
- Once installed you need to ensure that your terminal settings are pointing to the new font.
Hyper Terminal Font Settings
- Go to Preferences --> Find the
fontFamilyproperty --> AddInconsolata for Powerlineto the front of the list.

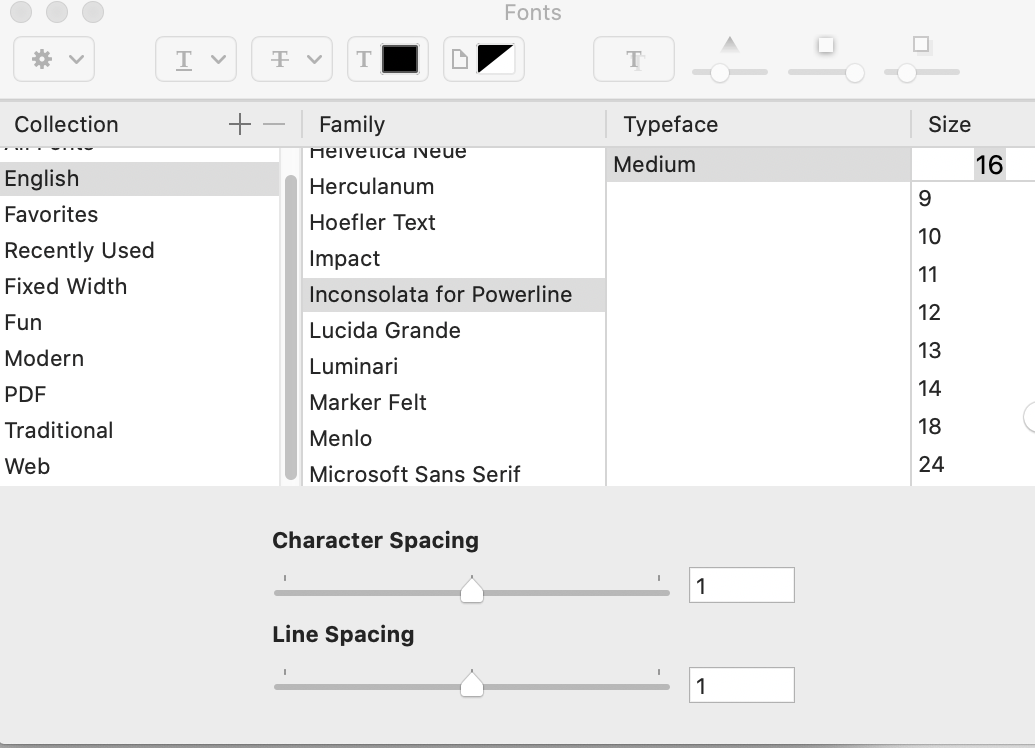
Default Terminal Font Settings
- Go to Preferences --> Click on the Profiles Tab --> Select the Profile --> Click "Change" to open up the font window.
- Select
Inconsolata for Powerlinefrom within the "Family" section

El Fin 👋🏽
Voila! After a few short steps, you should now have a cooler 😎 looking terminal than you did before. There are a lot more customizations you can make but this should provide you with the basics to add some flare ✨ to the otherwise plain-looking terminal. Feel free to share some screenshots of your pimped out terminals.