


Notion is an application that claims to be an "all-in-one workspace." It allows you to create things like personal dashboards, wikis, and databases. Plain and simple, Notion is way more than a note-taking app. I had heard a lot of hype around Notion and decided to give it a try earlier this year. I'll admit that I was skeptical at first. However, I am a huge fan now and it has become an essential tool in both my personal and professional life. In this article, I'll be focusing on Notion's database feature and how I utilize it to create an ever-growing knowledge and referral base of web development resources.
The Why 🤔
As developers, googling for information is part of the job. Even though there are tons of resources out there, it does not mean all solutions you find are created equal. You might be wondering, "How do I decide on what to save?" My answer is simple: Save whatever you think you might want to reference again.
For example: If you find a solution to a difficult problem or find a great article that makes a programming topic finally "click" for you, save it! You never know when you may need to solve a similar problem or need a refresher on a particular topic. As you continue to save resources and your database grows, you will reduce the amount of time you have to spend researching something. In return, this will speed up your overall development process.
Next, I'll provide an overview of some of Notion's key features that make this whole system flow.
Databases
Similar to spreadsheet applications, like Excel, databases in Notion allow you to structure and store information in a tabular format. However, with the added capabilities of filtering, views, and tags, the features of this extend way past a basic spreadsheet. There are three features of databases that make them unique from their competition:
- Customizable properties
- The ability to toggle between multiple views (Calendars, Galleries, etc)
- Every item is its own page that you can edit
 Image from official Notion Docs
Filters
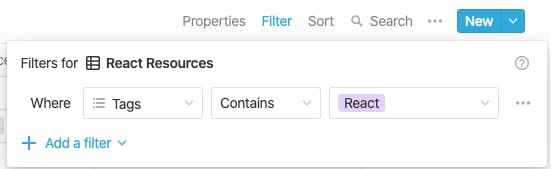
Filters in Notion allow you to distill the information in a database so that it only displays the relevant information based on the criteria you specify. Filters can be as simple or complex as you want them to be. Because my Web Dev Resources database is constantly growing and currently contains well over 100 items, filters make finding the relevant information fast and easy. Later on in the article, you'll see how filters and views play a key role in making all of this work cohesively.
 Image from official Notion Docs
Adding Resources
Finding and storing resources is the core of this whole process. First, you will want to install the Notion Web Clipper extension. Once that's installed, adding resources to your database is quite simple:
- Click the Notion icon in your extensions toolbar. You will see a box appear to allow you to select a database. At this time you can also edit the display name.
- Click "Save Page" and it will immediately get added to the database of your choice.

Table Properties
My resources database contains specific properties that make it easier for me to categorize the copious amounts of data that it stores. There are five properties that I have defined:
- Name
- This is the label that is associated with the resource and will be used as the title of the page.
- URL
- Links to the website where the resource was found.
- Description (Optional)
- I use this property when I want to provide some more context around the topic to which the resource links. I tend to use this more often for articles that cover broader topics or if I want to leave some keywords to make it more searchable.
- Author/Source (Optional)
- I use this property if the resource I found was from a well-known author or site that I reference fairly often. It lets me know where the information originated.
- Tags 🏷
- Tags represent the topic that the resource covers. I’ll discuss my tagging system in more detail in the next section since it's an important piece of the puzzle.
Organizing Resources
Tags 🏷
Tags are the crux of how I categorize and filter my database so associating the proper tag with the proper article is crucial. Thankfully my tagging system is pretty straightforward. If I find an article that fixes a React issue I was having, I give it the “React” tag. If a resource covers multiple topics, I just tag it with all the related topics. You get the picture.
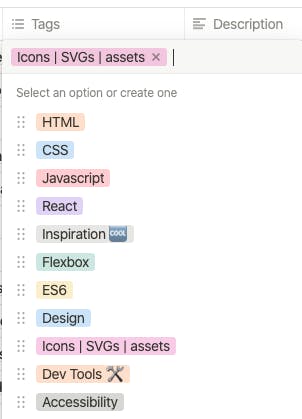 Subset of tags that I use
Views 🔭
Once we have our entries tagged properly, we can now move on to creating views. In Notion, databases can have multiple views that allow you to see your data in different formats. For this particular table, I opted to stick with the default table view. However, there are other view options, like Galleries and Kanban boards, that may suit your fancy better.

Filters 📊
Whenever I create a new view, I immediately set up a filter that only shows data with a specified tag. Then I give the view the same name as the tag creating a one-to-one correlation between the two. Configuring it this way makes it easy for me to drill down and find the pertinent information I am looking for. I can quickly toggle between different views to find what I need.
Example - Project Assets
One of my favorite and frequently used filters is one that I have tagged as "Assets for Projects." Needing to store these particular resources was the catalyst to set up this whole Web Development Resource database in the first place.
What gets stored in this view you may ask? Pretty much any type of asset that I may want to leverage on a project at some point. As I'm sure many of you all know, there are copious amounts of development project resources out there. There are so many that it can be hard to keep track of them all. In this view, you will find things like free icons and images, gradient and color palette generators, and the list goes on.
If you walk away with only one thing from this article, at least come up with a system where you store resources like this. I find this especially handy when I work on personal projects, as it significantly reduces the amount of time spent trying to find things like that free icon library I read about in that article a month ago that I don't remember the title of, for example 😆. This view is pretty much the solution to those kinds of problems.
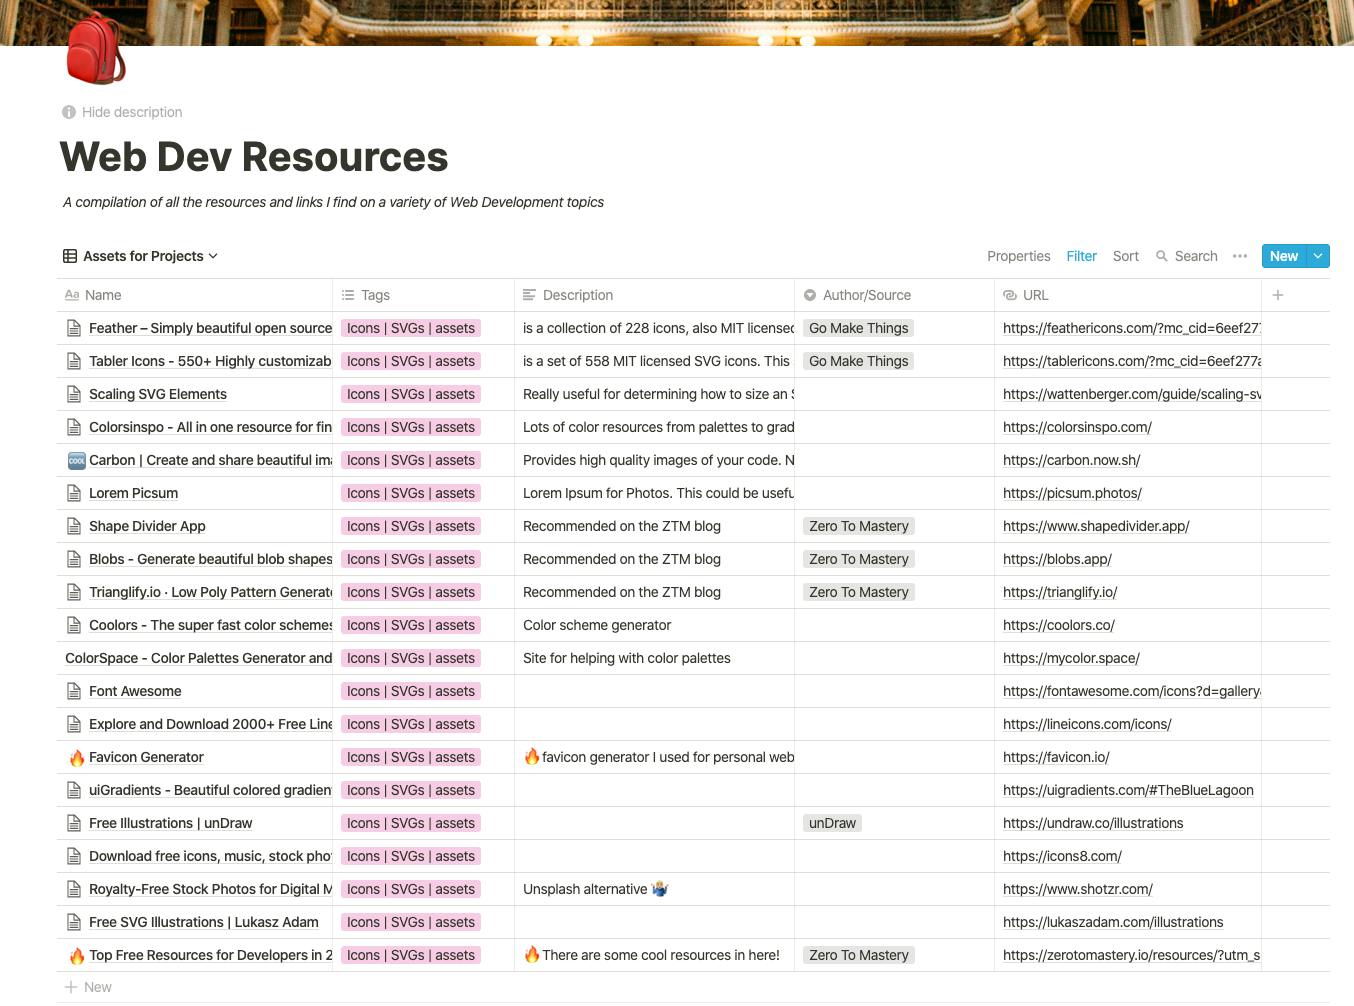 Preview of my Web Development Resources database
Benefits
I'm sure some of you have picked up on this by now, but I have a Type A personality and like structure 😅. This may look like a lot, but I promise you that it's well worth the reward. The initial "work" is in setting things up. After the initial setup, it's just a matter of adding what you want and assigning a tag. Once you get into the habit of adding helpful resources to your database, it becomes second nature.
Because I have a solid system in place, I am much more efficient and I can quickly and easily find what I need when I need it. Overall, it reduces the cognitive load needed to find useful information and I can work more effectively as a result.
El Fin 👋🏽
I hope you enjoyed getting a peek into part of my productivity process as a front-end developer. I use Notion, but there are myriads of other apps on the market that you can utilize. The main point is to find a system that works best for you and how your brain works. This is the process that works for me and I hope, by sharing, I have inspired some of you to take a second look at how to store information when it comes to working as a developer.
For those of you on the fence about trying Notion, they recently switched to a free plan for personal accounts so it's a great time to give it a try if you're interested.
Thanks for reading and happy coding!